Posts

Showing posts with the label Toyota Winnebago Warrior 1991 Buying & Repairing

13 - A Touch of Color

Image
I found this Rustoleum spray paint color and fell in love with it. I used it to add small splashes of color. Seems like white plastic turns yellow over time: I found this beautiful blue. I sprayed a plastic primer first, then the blue:

12 - What to Do With the Damaged Kitchen Counters

Image
I looks like the counter is particle board? and it looks like it got wet at one or many points in its lifetime. Water swells particle board... So the counter didn't look great and was sort of "wavy." We considered a new counter, but the hassle combined with the price made that option not quite as attractive. I wandered around Lowes mulling over my options. I just didn't feel like spending a lot of time on the counter tops. I found some "textured" spray paint by Rustoleum and chose to at least try it out. I taped off the sink, stove and walls and forged ahead. I sprayed a primer onto the old counter.  Now I was ready for the new paint. I was kind of horrified at how the paint came out. It sprayed in globs and didn't cover the surface evenly at all. I was annoyed and went home, leaving the gloppy paint and thinking I would have a big mess to clean the next day. As it turns out, the paint dried very evenly and looked pretty darn good! I was very pleasantly

11 - New Kitchen Faucet

Image
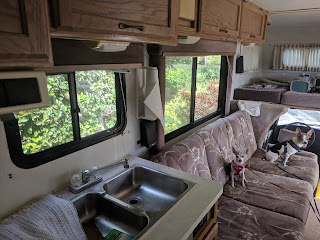
The kitchen faucet that came with our RV was functional. It was dated and looked old-fashioned. Plus, I was able to get a good deal on a new one on Ebay. It seems crazy but both the old faucet and the new are not metal, they are plastic! They both have a chrome finish and look like metal. I suppose this is to save weight in RV's. The new one has the hose sprayer that pulls out of the faucet. Having this hose sprayer makes it a lot easier to wash pots and pans in our little sink. Because of the different configuration of the new faucet, we had to drill new holes into the counter for it. It was pretty straight forward and surprisingly we did not run into any issues. The old faucet worked, but it looked dated. Oh yeah, that's Sheila Weela on the left and Liam Neeson on the right: unboxing the new faucet Drilling the new, wider-set holes: The old faucet: Un-boxing the new faucet: It worked out well and really gave the whole pla

10 - Replacing the Vents

Image
The seller added the big Maxair vent covers to the RV before we got it. He did this to cover up the sun damaged and shattered vents that were probably original. The Maxair covers prevented any further leaks. It's very likely that the damage to the bed platform was caused by the front vent leaking. As it turns out, we were able to find exact replacements for our vents at a very reasonable price, where else? Amazon, of course.  Adam was able to remove the vents and replace with the new vents. He put the Maxair covers back on. These are handy for example if you would like to open the vent while it's raining or when driving. Also, they protect the vent cover below from sun damage. The vents themselves were in pretty bad shape, the lids had shattered over time in the Florida sun: Adam removed the vent, cleaned it up and put in the new replacement vent; Don't forget to really goop on the Self-Leveling Dicor Sealant. We didn't get a photo of the vent

9 - The Rotting Cabover, We Did NOT See That Coming

Image
The walls of the bed area over the truck cab were fine. We did not check the actual bed platform though and we were in for a surprise. It was completely rotted. It all had to come out. We ended up replacing it with 3/4" exterior plywood. We saved the exterior "skin" and were able to glue it to the new ply. It worked out really well. Adam measured and cut the ply. We slid it into place and screwed it back into the side walls and front. At first, we did not realize the extent of the damage to the sleeping platform. Adam sat up there to remove the old curtains with no issues. Upon closer inspection, we realized there was a big problem. Adam tore out the rotted wood: Finally, we were down to just the "skin" Adam cut a new bed platform The original skin was saved Adam used Weldwood cement to adhere the skin to the new plywood piece Our friend Al was a HUGE help. He made u